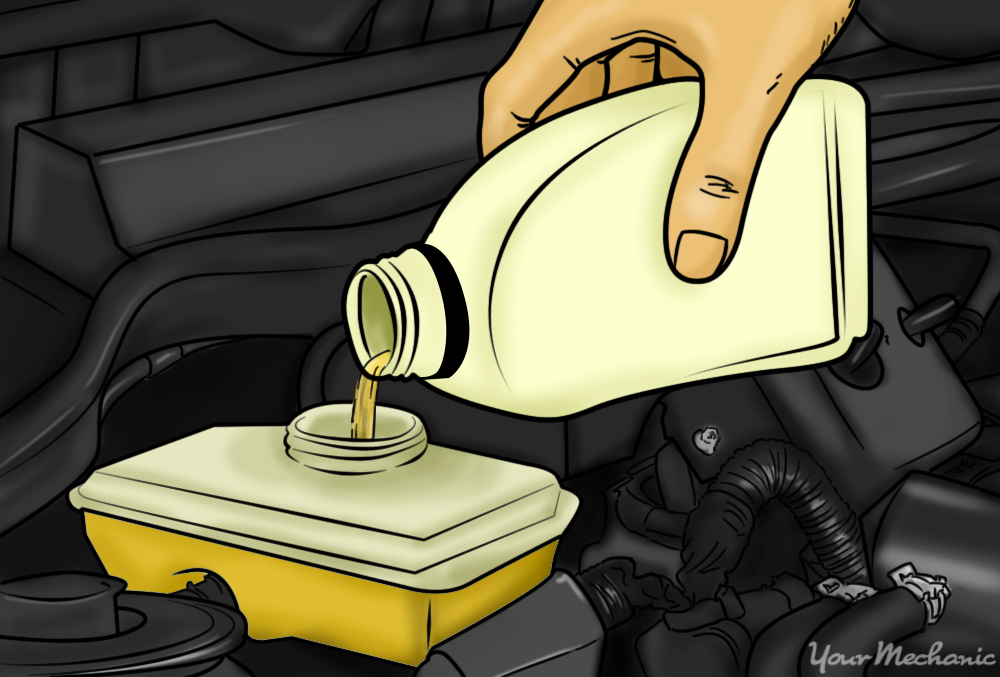
Improper shifting is a sign of car transmission problems. The solution might be simple or complex, but get it inspected to avoid expensive repairs.
If your car is not shifting properly, you could end up with very expensive transmission repairs. So, how do you know if your car isn’t shifting the way it should? Watch for these signs to avoid serious transmission trouble.
Warning light comes on: A warning light alone doesn’t necessarily mean that you have a shifting problem, but if you notice it along with any of the symptoms that follow, you should get it checked out.
Car is shifting hard: The car feels as if it’s reluctant to shift gears the way it usually does, or isn’t shifting smoothly. You might notice a clunking or thudding sound when the car shifts gears, or has difficulty reaching the proper speed.
Gear changes for no reason: If you’re driving a manual transmission in a certain gear, and the car suddenly changes gear with no action on your part, or if it suddenly slides into neutral in an automatic, you have a shifting problem. You might notice a whining sound or a change in the usual sound from your engine when this happens.
Fluid leak: If you’re having trouble shifting, it could be something as simple as a transmission fluid leak. Usually, transmission fluid shouldn’t leak, and if you see a puddle of fluid under your car, that can be a sign of a clogged filter or a loose plug. Transmission fluid is clear red, and has a slightly sweet smell.
Delayed engagement: Your car waits for a bit before going into drive and moving forward. You’ve pushed the clutch pedal down, brought it up to the point where the gears should engage and move your car forward, but there’s a pause before the vehicle moves. Even if you rev the engine, there’s still a delay.
Any indication that your car is not shifting properly should be dealt with immediately. You might have a simple issue that can be repaired inexpensively, but if you wait too long you could end up with serious transmission trouble and have to pay to repair or even replace your transmission. Be sure to contact a mechanic to check your transmission fluid and other parts of the transmission system as soon as you experience any shifting problems.
Car Care, Maintenance and Repairs Guide Blog. From AutoFactorNg.com (#1 Auto Parts and Products Retailer).
Thursday, 21 December 2017
Tuesday, 19 December 2017
5 Commonly Overlooked Vehicle Maintenance Items
Brake fluid, auto transmission fluid, and coolant flushes, as well as cabin filter changes and valve adjustments, are all important services.
Without a doubt, the best way to maintain your car is to follow the manufacturer's suggested service schedule, but some people opt not to for various reasons, cost often being one of them: scheduled maintenance services can certainly be expensive. Generally when people think of routine maintenance for their vehicle, they only think of things like oil changes and air filters, so they see the rest of the maintenance service as an unnecessary expense. Unfortunately, looking at it this way means a number of important services never get performed. If you choose to maintain your car differently than the manufacturer recommends, make sure these five otherwise forgotten services get completed.
1. Brake fluid flush
Brake fluid is hygroscopic, which means it attracts and absorbs moisture. Even in a sealed brake system, the brake fluid can absorb moisture from the surrounding environment, resulting in lowered boiling temperature of brake fluid, and introduces the possibility of rust and corrosion in the hydraulic brake system. Most manufacturers specify different intervals for brake fluid flushes. If your manufacturer doesn’t specify, or they specify more than several years between services, then we recommend having it done every three years or 36,000 miles, whichever comes first.
2. Automatic transmission fluid flush
In order to make their vehicles seem low maintenance, automotive manufacturers began selling cars with “lifetime transmission fluid” that never needed to be changed. If this sounds too good to be true, that’s because it is. Modern transmissions work harder than their predecessors and in tighter engine compartments with less ventilation, so their fluid still degrades over time. Cars with “lifetime transmission fluid” often experience an increased rate of transmission failures after 100,000 miles. If you want your transmission to go the distance, it’s suggested that you change the transmission fluid every 60,000 miles, give or take a few thousand miles.
3. Coolant flush
Just like automatic transmission fluid, coolant is often sold as another “lifetime fluid.” Once again, this is not entirely true. The coolant degrades over time with normal use, and the ph balance becomes less than ideal, which can cause the coolant to damage parts of the cooling system or engine. A good interval is to change the coolant every 40,000-60,000 miles. This should help keep the coolant ph level at a proper balance, which should keep your cooling system healthy.
4. Cabin air filter
The cabin air filter is responsible for filtering the air coming into the passenger compartment from outside the vehicle. Some vehicles use a simple particulate filter, which removes dust and pollen from the air; some use an activated charcoal filter which removes the same dust and pollen, but can also remove smells and pollutants. Replacement of these filters is usually inexpensive, and can greatly improve the quality of the air you’re breathing in the car, making them a worthwhile investment.
5. Valve adjustments
Despite most newer cars using automatically adjusting hydraulic valve lifters, there are still a large number of vehicles on the road that use mechanical valve lifters. These lifters require occasional clearance checks, and adjustments if necessary. Best case scenario: running valves too tight or too loose can cause reduced power and efficiency. Worst case scenario: the engine can suffer severe damage, such as a burned valve.
Although this list is not completely inclusive of all the services that are normally skipped over when they should be performed, it is a list of some of the most commonly overlooked services that can have a big impact on how your vehicle performs. It’s also a reminder to ensure these services are done on your vehicle should you choose to follow an alternative maintenance schedule or plan. Though of course, the best way to maintain your vehicle is still to follow the manufacturer’s maintenance schedule.

Without a doubt, the best way to maintain your car is to follow the manufacturer's suggested service schedule, but some people opt not to for various reasons, cost often being one of them: scheduled maintenance services can certainly be expensive. Generally when people think of routine maintenance for their vehicle, they only think of things like oil changes and air filters, so they see the rest of the maintenance service as an unnecessary expense. Unfortunately, looking at it this way means a number of important services never get performed. If you choose to maintain your car differently than the manufacturer recommends, make sure these five otherwise forgotten services get completed.
1. Brake fluid flush

Brake fluid is hygroscopic, which means it attracts and absorbs moisture. Even in a sealed brake system, the brake fluid can absorb moisture from the surrounding environment, resulting in lowered boiling temperature of brake fluid, and introduces the possibility of rust and corrosion in the hydraulic brake system. Most manufacturers specify different intervals for brake fluid flushes. If your manufacturer doesn’t specify, or they specify more than several years between services, then we recommend having it done every three years or 36,000 miles, whichever comes first.
2. Automatic transmission fluid flush

3. Coolant flush

Just like automatic transmission fluid, coolant is often sold as another “lifetime fluid.” Once again, this is not entirely true. The coolant degrades over time with normal use, and the ph balance becomes less than ideal, which can cause the coolant to damage parts of the cooling system or engine. A good interval is to change the coolant every 40,000-60,000 miles. This should help keep the coolant ph level at a proper balance, which should keep your cooling system healthy.
4. Cabin air filter

The cabin air filter is responsible for filtering the air coming into the passenger compartment from outside the vehicle. Some vehicles use a simple particulate filter, which removes dust and pollen from the air; some use an activated charcoal filter which removes the same dust and pollen, but can also remove smells and pollutants. Replacement of these filters is usually inexpensive, and can greatly improve the quality of the air you’re breathing in the car, making them a worthwhile investment.
5. Valve adjustments

Despite most newer cars using automatically adjusting hydraulic valve lifters, there are still a large number of vehicles on the road that use mechanical valve lifters. These lifters require occasional clearance checks, and adjustments if necessary. Best case scenario: running valves too tight or too loose can cause reduced power and efficiency. Worst case scenario: the engine can suffer severe damage, such as a burned valve.
Although this list is not completely inclusive of all the services that are normally skipped over when they should be performed, it is a list of some of the most commonly overlooked services that can have a big impact on how your vehicle performs. It’s also a reminder to ensure these services are done on your vehicle should you choose to follow an alternative maintenance schedule or plan. Though of course, the best way to maintain your vehicle is still to follow the manufacturer’s maintenance schedule.
Thursday, 14 December 2017
5 Causes of Steering Wheel Hard to Turn
Every vehicle has a steering system which gives the driver control over the direction in which they are driving. If you don’t have a functional steering system, then it will create all kinds of problems for you. More importantly, it will make your vehicle unsafe for yourself and the other people on the road around you. Just imagine having to make a turn or trying to change lanes and then having the steering wheel lock up or move slowly. This will likely cause an accident to the point where someone could be injured or killed.
The most common problem with the steering wheel is that it can become difficult to turn. Since most people turn while driving at low speeds, this is when the hard to turn problem will be noticeable. It is a clear indication that your power steering system is having a problem somewhere. There are many components which make up the power steering system. Aside from the serpentine belt and the pump, the system contains hydraulic power steering fluid which works against the piston so that you can easily turn the wheel without much resistance. If there were to be an issue with any one of these areas of the system, then you wouldn’t get the assistance of the power steering to make turning the wheel easier.
Top 5 Common Causes
It is important to understand the main causes of a hard to turn steering wheel. Below are the top 5 causes which you can investigate as soon as you notice that your steering wheel is getting more difficult to turn.
1) Bad Steering Rack – The steering rack is made up of the pinion and rack. A series of U-joints and shafts keep the steering rack attached to the steering wheel. The steering rack will eventually become worn out and damaged from simply using your vehicle. You will know when this happens if your steering wheel is only stiff after you’ve started your vehicle. As the engine stays on longer, the steering rack will get hotter which causes the lubricant to settle in more. Therefore, the steering wheel may become less stiff as the car continues to run. But still, get the rack replaced before the problem escalates.
2) Broken Serpentine Belt – One of the most common causes of steering wheel stiffness is when the serpentine belt is damaged or cracked. This belt is constantly being used when you drive the vehicle so over time, it gets worn down pretty quickly. Then it will become loose which is when the stiffness in the steering wheel will begin. If you don’t replace the belt soon, it will break altogether and then you won’t be able to move the steering wheel at all. It is better to replace the belt before this happens.
3) Leaky Fluid – Perhaps the top cause of a stiff steering wheel is when you don’t have enough power steering fluid in the system. Usually, this occurs if the fluid is leaking from the pressurized hose area. Sometimes the hose will get cracked or simply become loose, causing the fluid to leak out. Since this fluid is needed to pressurize the system and lubricate the pump, you will have a stiff steering wheel if there isn’t enough fluid to perform these tasks in the system.
4) Pump Failure – The pump of the power steering system is what produces the amount of pressure needed to allow you to smoothly turn the steering wheel. If this pump were to stop working, then it will become more difficult to turn the steering wheel. Normally, in these situations, the pump won’t prevent the steering wheel from moving completely. You will still be able to turn it, but it will require a lot more force on your end.
5) Thick Fluid – The power steering fluid can become thicker over time. If you don’t change your fluid regularly, then it will become too thick to lubricate the system. This will cause more stiffness in the steering as you try to turn at low speeds. Therefore, you need to drain this old fluid out and replace it with entirely new fluid.
The most common problem with the steering wheel is that it can become difficult to turn. Since most people turn while driving at low speeds, this is when the hard to turn problem will be noticeable. It is a clear indication that your power steering system is having a problem somewhere. There are many components which make up the power steering system. Aside from the serpentine belt and the pump, the system contains hydraulic power steering fluid which works against the piston so that you can easily turn the wheel without much resistance. If there were to be an issue with any one of these areas of the system, then you wouldn’t get the assistance of the power steering to make turning the wheel easier.
Top 5 Common Causes
It is important to understand the main causes of a hard to turn steering wheel. Below are the top 5 causes which you can investigate as soon as you notice that your steering wheel is getting more difficult to turn.
1) Bad Steering Rack – The steering rack is made up of the pinion and rack. A series of U-joints and shafts keep the steering rack attached to the steering wheel. The steering rack will eventually become worn out and damaged from simply using your vehicle. You will know when this happens if your steering wheel is only stiff after you’ve started your vehicle. As the engine stays on longer, the steering rack will get hotter which causes the lubricant to settle in more. Therefore, the steering wheel may become less stiff as the car continues to run. But still, get the rack replaced before the problem escalates.
2) Broken Serpentine Belt – One of the most common causes of steering wheel stiffness is when the serpentine belt is damaged or cracked. This belt is constantly being used when you drive the vehicle so over time, it gets worn down pretty quickly. Then it will become loose which is when the stiffness in the steering wheel will begin. If you don’t replace the belt soon, it will break altogether and then you won’t be able to move the steering wheel at all. It is better to replace the belt before this happens.
3) Leaky Fluid – Perhaps the top cause of a stiff steering wheel is when you don’t have enough power steering fluid in the system. Usually, this occurs if the fluid is leaking from the pressurized hose area. Sometimes the hose will get cracked or simply become loose, causing the fluid to leak out. Since this fluid is needed to pressurize the system and lubricate the pump, you will have a stiff steering wheel if there isn’t enough fluid to perform these tasks in the system.
4) Pump Failure – The pump of the power steering system is what produces the amount of pressure needed to allow you to smoothly turn the steering wheel. If this pump were to stop working, then it will become more difficult to turn the steering wheel. Normally, in these situations, the pump won’t prevent the steering wheel from moving completely. You will still be able to turn it, but it will require a lot more force on your end.
5) Thick Fluid – The power steering fluid can become thicker over time. If you don’t change your fluid regularly, then it will become too thick to lubricate the system. This will cause more stiffness in the steering as you try to turn at low speeds. Therefore, you need to drain this old fluid out and replace it with entirely new fluid.
Tuesday, 12 December 2017
How Often Does My Car Need a Power Steering Fluid Service?
The purpose of the power steering system is to ensure easy handling and precise direction as a vehicle is being driven. The power steering system assists steering by guiding part of an engine’s power towards one front wheel or the other.
Using a hydraulic system, the power steering wheel works by using a belt driven pump to provide pressure. This hydraulic pressure is produced by a rotary-vane pump driven by the vehicle's engine.
What power steering fluid does
The power steering fluid is the hydraulic fluid that transmits the power in the power steering system. There is no definite time frame on when to change power steering fluid. The general rule of thumb that states the power steering fluid should be replaced every four years or after running the vehicle for 50,000 miles. A licensed mechanic will recommend that the power steering fluid be changed if it looks light brown when he or she is doing a vehicle inspection. The vehicle’s user manual will give a more concrete time frame.
Changing the power steering system fluid requires draining or flushing out the old fluid and then adding fresh power steering fluid. Depending on the type of car, a specially designed power steering fluid may need to be used. A licensed mechanic will check that information before changing the power steering fluid. Changing the power steering fluid can be a time-consuming process, and it is important that it be done correctly. A certified mobile mechanic from AutoFactorNG can change the power steering fluid quickly and easily.
Using a hydraulic system, the power steering wheel works by using a belt driven pump to provide pressure. This hydraulic pressure is produced by a rotary-vane pump driven by the vehicle's engine.
What power steering fluid does
The power steering fluid is the hydraulic fluid that transmits the power in the power steering system. There is no definite time frame on when to change power steering fluid. The general rule of thumb that states the power steering fluid should be replaced every four years or after running the vehicle for 50,000 miles. A licensed mechanic will recommend that the power steering fluid be changed if it looks light brown when he or she is doing a vehicle inspection. The vehicle’s user manual will give a more concrete time frame.
Changing the power steering system fluid requires draining or flushing out the old fluid and then adding fresh power steering fluid. Depending on the type of car, a specially designed power steering fluid may need to be used. A licensed mechanic will check that information before changing the power steering fluid. Changing the power steering fluid can be a time-consuming process, and it is important that it be done correctly. A certified mobile mechanic from AutoFactorNG can change the power steering fluid quickly and easily.
Thursday, 7 December 2017
7 Symptoms of a Bad Fuel Injectors
The fuel system inside most vehicles has something called a fuel injector. The function of the fuel injector is to supply the engine with fuel. The injector basically sprays fuel into the cylinder of the engine through a nozzle so that the internal combustion process can begin. The computer which manages the engine (called the Engine Control Unit) also manages its vital components, such as the fuel injector. It makes sure the injector sprays fuel at just the right intervals so that the engine can give its best performance possible.
If something were to go wrong with the fuel injector, then your vehicle’s engine won’t be able to perform the way it’s supposed to. A bad fuel injector will either prevent fuel from being sprayed into the engine all together or it will mess up the intervals at which it is supposed to be sprayed. Either way, it will render your vehicle undriveable.
Below are 7 symptoms of a bad fuel injector that you can recognize early on. Then you can get the injector replaced before any serious damage is done to your engine.
Engine Vibrates – When the engine cylinder doesn’t get enough fuel, the engine will vibrate after it tries to finish each cycle without fuel.
Engine Misfires – If the engine does not get enough fuel sprayed into it, then the engine will misfire as you try to start it up. If you are able to start it up, you will have a hard time taking off or there will be a pause after you step on the gas pedal. Either way, you likely won’t be able to drive very long because the engine will eventually stall.
Engine Light Turns On – The most obvious sign of a problem is when the “Check Engine” light illuminates on your dashboard. Although this could mean a lot of things, a bad fuel injector could be one of them.
Fuel Odor – If the fuel injector is not closed completely, then fuel won’t be getting burnt. This means the odor from the fuel will be easy to smell.
Engine Surge – If the fuel injector is spraying too much fuel into the engine cylinder, this will create a fast surge in the engine and cause your acceleration to be much slower.
Bad Fuel Economy – If the engine is not getting the right amount of fuel it needs for combustion, then it will place more demand on the injector to supply it with additional fuel. This means your fuel economy is going to go down as you pay more for gas.
Fuel Leak – If your fuel injector is actually broken or cracked from damage or old age, then gasoline will begin to leak out of it. This means the fuel won’t be able to reach the nozzle but instead, it will leak from the body. If you check the fuel injector, you will be able to see the gasoline all over it if there’s a leak.
If something were to go wrong with the fuel injector, then your vehicle’s engine won’t be able to perform the way it’s supposed to. A bad fuel injector will either prevent fuel from being sprayed into the engine all together or it will mess up the intervals at which it is supposed to be sprayed. Either way, it will render your vehicle undriveable.
Below are 7 symptoms of a bad fuel injector that you can recognize early on. Then you can get the injector replaced before any serious damage is done to your engine.
Engine Vibrates – When the engine cylinder doesn’t get enough fuel, the engine will vibrate after it tries to finish each cycle without fuel.
Engine Misfires – If the engine does not get enough fuel sprayed into it, then the engine will misfire as you try to start it up. If you are able to start it up, you will have a hard time taking off or there will be a pause after you step on the gas pedal. Either way, you likely won’t be able to drive very long because the engine will eventually stall.
Engine Light Turns On – The most obvious sign of a problem is when the “Check Engine” light illuminates on your dashboard. Although this could mean a lot of things, a bad fuel injector could be one of them.
Fuel Odor – If the fuel injector is not closed completely, then fuel won’t be getting burnt. This means the odor from the fuel will be easy to smell.
Engine Surge – If the fuel injector is spraying too much fuel into the engine cylinder, this will create a fast surge in the engine and cause your acceleration to be much slower.
Bad Fuel Economy – If the engine is not getting the right amount of fuel it needs for combustion, then it will place more demand on the injector to supply it with additional fuel. This means your fuel economy is going to go down as you pay more for gas.
Fuel Leak – If your fuel injector is actually broken or cracked from damage or old age, then gasoline will begin to leak out of it. This means the fuel won’t be able to reach the nozzle but instead, it will leak from the body. If you check the fuel injector, you will be able to see the gasoline all over it if there’s a leak.
Tuesday, 5 December 2017
7 Easy Ways to Tell if You Need to Buy New Tires
Maybe you got a flat tire that one time, or maybe you wondered if winter tires are really necessary (they are, depending on where you live). Often, though, with the exception of situations like these, many drivers forget about their tires until there’s an obvious issue.
Considering how important the condition of your tires is, you would seriously benefit from keeping an eye on your tires and knowing when you need to replace them. Below we look at 7 ways to tell if the time has come for you to buy new tires for your ride.
1. They’re Worn Out
It doesn’t take a ton of detective work to determine if your tires are worn out. Essentially all of today’s tires actually have tread-wear indicators. These raised bars that live in the indentations between tread blocks let you know when you’ve reached the generally recognized legal wear minimum for your tires (1.6mm or 2/32”). Once these bars are level with the tread of your tires, you know it’s time to replace them.
Why, you ask? Basically, at the point the tread depth is at 1.6mm, a tire’s ability to maintain traction in wet (not to mention snowy) conditions has been seriously undermined. In fact, many companies recommend replacement at closer to 3-3.2mm for summer/all season tires and 4-5mm for winter tires. Winter tires often have a second set of indicators to show if your tires have the grip to truly qualify as winter tires, or if they are worn down to the level where they have essentially become all-season tires and are less effective in the snow.
Hot Tip: To figure out where indicators are on your tires, there are usually arrows, logos or “TWI” molded into the tire’s sidewall.
2. They’re Cracked
Like people, rubber hardens and dries out as it ages. New tires have oils and chemicals meant to slow this process, but over time, they tend to evaporate, leak out or just break down. Things like UV exposure, repeated tire dressing or excessive heat-cycling (from under-inflation or track use) help to speed up the deterioration of tires.
Try getting down close to your tires and looking for tiny cracks in either the sidewall or tread blocks as well as bigger cracks between the treads. Also, check for cracks in the sidewall near the tire bead. Very minor/cosmetic cracking is typically allowed, from a safety standpoint, but could be a sign of things to come. If you’re seeing anything deeper, it’s time to buy new tires.
3. They’re Old
In Canada (and the U.S.), all street-legal tires are required to have a production date code, showing the week and the year, stamped into their sidewall. This 4-digit code is usually included in the DOT serial code on one side of the sidewall (keep in mind: the DOT serial code is often on both sides of the sidewall, but the production date code is usually only on one side). A code that reads “3615” would mean the tire was made in the 36th week of 2015. Fun!
As discussed above, a certain amount of breakdown happens over time with tires, and even if you can’t see it, it’s happening and it’s compromising your tires’ effectiveness. Auto industry experts tend to recommend replacing your tires every 6 to 10 years, and getting routine inspections to monitor their wear in that timeframe.
4. Their Traction is Diminished
You might think we already covered this in the tread depth section, but a vehicle’s tires may appear to be A-OK in terms of tread depth, age, and rubber dryness, but still have compromised traction. This is especially common in light-duty truck and passenger car tires with high tread-life indexes, particularly in wet conditions.
What happens is, the tread compound hardens from either heat cycling or simply tire design or construction. This hardening undermines the grip of the tire. If you’re noticing your tires look fine but don’t feel as though they’re gripping the road like they once were, you should probably ditch ‘em.
5. You or a Mechanic Find Out-of-Round/Shifted Belts
If you feel a vibration or shimmy/shake as you drive, it’s easy to assume it’s just a balance issue, but that may not be the case. Not all tires are created equal or perfect. Individual tires may have issues such as manufacturing defects or perhaps they’ve suffered damage from rogue road debris or shoddy streets/potholes.
If your tires are out of balance, the result can be reduced stability and unnecessary component wear and tear, which is a pain in and of itself. But if you feel those vibrations when you drive, especially at very low speeds, you should ask that a mechanic inspect for shifted belts when checking/realigning the balance.
The “shimmy/shake” at very low speeds can be a sign of a shifted belt, which is a structural failure within the tire. If this issue isn’t dealt with in a timely manner, you risk tire failure, especially in high-speed situations like highway driving. This could mean not only damage to your car, but danger to you and your passengers as well, since you could potentially experience loss of control while driving.
If you or your mechanic find major out-of-round conditions or shifted belts, buy new tires immediately.
6. They’re Damaged
Obviously, a tire that can’t hold its air is grounds for replacement, but there are other, less obvious, offenders to look out for as well. Gouges, abrasions/scuffing to the tread or sidewall and deep cuts that don’t create an actual hole in the tire may still mean you need to replace it. Internal damage to the tire(s) from being driven while low on air (or even while flat) or a puncture to the tire in an area that can’t be patched may also be cause for replacement. Think of this as a preventative measure to avoid getting a flat or even worse, experiencing truly dangerous tire failure.
7. You’re Just Jonesing For an Upgrade
Don’t feel obligated to wait for something bad to happen to your rubber before you buy new tires. Your current tires may be fine, but if you want more handsome wheels or tires to give your ride a sharper look or higher performance potential, go for it! Between high-end tires and stylish replacement wheels (don’t even get us started on wheels and rims) you have a ton of options that will result in a more personalized and, frankly, better ride.
For some of the best tire brands you can buy right now at some of the best prices, CLICK HERE
Considering how important the condition of your tires is, you would seriously benefit from keeping an eye on your tires and knowing when you need to replace them. Below we look at 7 ways to tell if the time has come for you to buy new tires for your ride.
1. They’re Worn Out
It doesn’t take a ton of detective work to determine if your tires are worn out. Essentially all of today’s tires actually have tread-wear indicators. These raised bars that live in the indentations between tread blocks let you know when you’ve reached the generally recognized legal wear minimum for your tires (1.6mm or 2/32”). Once these bars are level with the tread of your tires, you know it’s time to replace them.
Why, you ask? Basically, at the point the tread depth is at 1.6mm, a tire’s ability to maintain traction in wet (not to mention snowy) conditions has been seriously undermined. In fact, many companies recommend replacement at closer to 3-3.2mm for summer/all season tires and 4-5mm for winter tires. Winter tires often have a second set of indicators to show if your tires have the grip to truly qualify as winter tires, or if they are worn down to the level where they have essentially become all-season tires and are less effective in the snow.
Hot Tip: To figure out where indicators are on your tires, there are usually arrows, logos or “TWI” molded into the tire’s sidewall.
2. They’re Cracked
Like people, rubber hardens and dries out as it ages. New tires have oils and chemicals meant to slow this process, but over time, they tend to evaporate, leak out or just break down. Things like UV exposure, repeated tire dressing or excessive heat-cycling (from under-inflation or track use) help to speed up the deterioration of tires.
Try getting down close to your tires and looking for tiny cracks in either the sidewall or tread blocks as well as bigger cracks between the treads. Also, check for cracks in the sidewall near the tire bead. Very minor/cosmetic cracking is typically allowed, from a safety standpoint, but could be a sign of things to come. If you’re seeing anything deeper, it’s time to buy new tires.
3. They’re Old
In Canada (and the U.S.), all street-legal tires are required to have a production date code, showing the week and the year, stamped into their sidewall. This 4-digit code is usually included in the DOT serial code on one side of the sidewall (keep in mind: the DOT serial code is often on both sides of the sidewall, but the production date code is usually only on one side). A code that reads “3615” would mean the tire was made in the 36th week of 2015. Fun!
As discussed above, a certain amount of breakdown happens over time with tires, and even if you can’t see it, it’s happening and it’s compromising your tires’ effectiveness. Auto industry experts tend to recommend replacing your tires every 6 to 10 years, and getting routine inspections to monitor their wear in that timeframe.
4. Their Traction is Diminished
You might think we already covered this in the tread depth section, but a vehicle’s tires may appear to be A-OK in terms of tread depth, age, and rubber dryness, but still have compromised traction. This is especially common in light-duty truck and passenger car tires with high tread-life indexes, particularly in wet conditions.
What happens is, the tread compound hardens from either heat cycling or simply tire design or construction. This hardening undermines the grip of the tire. If you’re noticing your tires look fine but don’t feel as though they’re gripping the road like they once were, you should probably ditch ‘em.
5. You or a Mechanic Find Out-of-Round/Shifted Belts
If you feel a vibration or shimmy/shake as you drive, it’s easy to assume it’s just a balance issue, but that may not be the case. Not all tires are created equal or perfect. Individual tires may have issues such as manufacturing defects or perhaps they’ve suffered damage from rogue road debris or shoddy streets/potholes.
If your tires are out of balance, the result can be reduced stability and unnecessary component wear and tear, which is a pain in and of itself. But if you feel those vibrations when you drive, especially at very low speeds, you should ask that a mechanic inspect for shifted belts when checking/realigning the balance.
The “shimmy/shake” at very low speeds can be a sign of a shifted belt, which is a structural failure within the tire. If this issue isn’t dealt with in a timely manner, you risk tire failure, especially in high-speed situations like highway driving. This could mean not only damage to your car, but danger to you and your passengers as well, since you could potentially experience loss of control while driving.
If you or your mechanic find major out-of-round conditions or shifted belts, buy new tires immediately.
6. They’re Damaged
Obviously, a tire that can’t hold its air is grounds for replacement, but there are other, less obvious, offenders to look out for as well. Gouges, abrasions/scuffing to the tread or sidewall and deep cuts that don’t create an actual hole in the tire may still mean you need to replace it. Internal damage to the tire(s) from being driven while low on air (or even while flat) or a puncture to the tire in an area that can’t be patched may also be cause for replacement. Think of this as a preventative measure to avoid getting a flat or even worse, experiencing truly dangerous tire failure.
7. You’re Just Jonesing For an Upgrade
Don’t feel obligated to wait for something bad to happen to your rubber before you buy new tires. Your current tires may be fine, but if you want more handsome wheels or tires to give your ride a sharper look or higher performance potential, go for it! Between high-end tires and stylish replacement wheels (don’t even get us started on wheels and rims) you have a ton of options that will result in a more personalized and, frankly, better ride.
For some of the best tire brands you can buy right now at some of the best prices, CLICK HERE
Thursday, 30 November 2017
9 Causes of Grinding Noise & Vibration when Braking
Most cars these days have brakes built into each wheel. A hydraulic system is used to manage them. There could be a drum brake or disc brake in the wheel.
When you step on the brake pedal, the front wheel brakes have a bigger role in slowing down the vehicle than rear wheel brakes. The reason for this is that the weight of the car pushes forward when you apply the brakes.
Most vehicles use disc brakes in the front because they have greater efficiency. It is the rear wheels which use drum brakes.
Common Causes of Noise and Vibration when Braking
When you hear an annoying sound after you apply the brake, then there might be a problem. Sometimes it might be nothing and the sound will go away. But if the sound is consistent and does not go away, then you could have brake problems. Below are 9 reasons for why this brake noise would occur.
1) Worn Brake Pads
If you hear a grinding sound after you step on the brake pedal, then it could mean that your brake pads are worn out. As the backing plate loses its material, this causes metal to come together with other metal. Either that or the brake caliper may be making contact with the rotor. Whichever one it is, your brakes could become severely damaged if the pads are not replaced. Your rotor could be destroyed by the backing plate, resulting in damage and grooves. The rotor will then do the same thing to the caliper.
2) Bad Quality Brake Pads
Don’t try to save money by purchasing poor quality brake pads. There are metal chunks in these pads which will scrape against the rotor and cause severe damage. You will save money in the long run by choosing a reputable brand for your brake pads.
3) Shims
Any time you get a brake job done, you must replace the shims. Your mechanic may avoid this if they want to do their job fast, so make sure they do replace them.
Shims that are not replaced soon enough will end up getting worn down. Eventually, the shim will connect with a piece of the braking system, like the rotor. With metal touching other metal like this, you will hear sounds from your braking system as you drive the vehicle. So, make sure you replace the shims.
4) Debris in Brakes
Your brake system could have outside debris that is lodged in it. This debris could be a gravel piece or a rock that gets stuck in the caliper. Then, the debris will rest between the rotor and caliper, and cause noises to occur. You will continue to hear these noises, even if you’re not applying pressure to the brake pedal. Your rotor may get damaged after a while from this too.
5) Don’t Drive That Much
Brake pads will usually last for 20,000 miles or so. But if you start having braking problems sooner, then it could be from leaving your vehicle idle for weeks on end without driving it. If the rotors don’t get to move for too long, then corrosion and rust will form on them. After a while, other components of the braking system will have rust too. Avoid this problem by driving your vehicle at least once every other day.
6) Caliper Piston
When debris or dirt is caught between the brake pads and the piston, sounds can be heard as you apply pressure to the brake pedal. Also, the brake pads’ backside needed to be lubricated when the pads were installed. If they weren’t lubricated, then the metal of the pads and metal of the caliper piston will make come together and make grinding noises. This scenario is less common than the first one.
7) Rotor discs
If you have worn out rotor discs, there will be braking sounds. Rotors that are not flat will create squeaking noises. If the rotors are too worn out, there will be scraping noises instead. On top of that, worn rotors will create lots of vibrations from the braking system. The vibrations may come at irregular patterns and your foot will be able to feel them through the brake pedal.
8) Caliper Bolts
Caliper bolts must undergo lubrication or else their slides will create sounds if they’re dry. This scenario is less likely to occur, but it could. A reputable auto repair shop will automatically give you new caliper bolts during their repair work.
9) Wheel Bearing
The least likely reason for having brake noises. If grinding sounds can be heard from your wheels or if you experience vibrations which alternate from loud to quiet, then you could have a faulty wheel bearing.
When you step on the brake pedal, the front wheel brakes have a bigger role in slowing down the vehicle than rear wheel brakes. The reason for this is that the weight of the car pushes forward when you apply the brakes.
Most vehicles use disc brakes in the front because they have greater efficiency. It is the rear wheels which use drum brakes.
Common Causes of Noise and Vibration when Braking
When you hear an annoying sound after you apply the brake, then there might be a problem. Sometimes it might be nothing and the sound will go away. But if the sound is consistent and does not go away, then you could have brake problems. Below are 9 reasons for why this brake noise would occur.
1) Worn Brake Pads
If you hear a grinding sound after you step on the brake pedal, then it could mean that your brake pads are worn out. As the backing plate loses its material, this causes metal to come together with other metal. Either that or the brake caliper may be making contact with the rotor. Whichever one it is, your brakes could become severely damaged if the pads are not replaced. Your rotor could be destroyed by the backing plate, resulting in damage and grooves. The rotor will then do the same thing to the caliper.
2) Bad Quality Brake Pads
Don’t try to save money by purchasing poor quality brake pads. There are metal chunks in these pads which will scrape against the rotor and cause severe damage. You will save money in the long run by choosing a reputable brand for your brake pads.
3) Shims
Any time you get a brake job done, you must replace the shims. Your mechanic may avoid this if they want to do their job fast, so make sure they do replace them.
Shims that are not replaced soon enough will end up getting worn down. Eventually, the shim will connect with a piece of the braking system, like the rotor. With metal touching other metal like this, you will hear sounds from your braking system as you drive the vehicle. So, make sure you replace the shims.
4) Debris in Brakes
Your brake system could have outside debris that is lodged in it. This debris could be a gravel piece or a rock that gets stuck in the caliper. Then, the debris will rest between the rotor and caliper, and cause noises to occur. You will continue to hear these noises, even if you’re not applying pressure to the brake pedal. Your rotor may get damaged after a while from this too.
5) Don’t Drive That Much
Brake pads will usually last for 20,000 miles or so. But if you start having braking problems sooner, then it could be from leaving your vehicle idle for weeks on end without driving it. If the rotors don’t get to move for too long, then corrosion and rust will form on them. After a while, other components of the braking system will have rust too. Avoid this problem by driving your vehicle at least once every other day.
6) Caliper Piston
When debris or dirt is caught between the brake pads and the piston, sounds can be heard as you apply pressure to the brake pedal. Also, the brake pads’ backside needed to be lubricated when the pads were installed. If they weren’t lubricated, then the metal of the pads and metal of the caliper piston will make come together and make grinding noises. This scenario is less common than the first one.
7) Rotor discs
If you have worn out rotor discs, there will be braking sounds. Rotors that are not flat will create squeaking noises. If the rotors are too worn out, there will be scraping noises instead. On top of that, worn rotors will create lots of vibrations from the braking system. The vibrations may come at irregular patterns and your foot will be able to feel them through the brake pedal.
8) Caliper Bolts
Caliper bolts must undergo lubrication or else their slides will create sounds if they’re dry. This scenario is less likely to occur, but it could. A reputable auto repair shop will automatically give you new caliper bolts during their repair work.
9) Wheel Bearing
The least likely reason for having brake noises. If grinding sounds can be heard from your wheels or if you experience vibrations which alternate from loud to quiet, then you could have a faulty wheel bearing.
Tuesday, 28 November 2017
Radiator Cap Functions and Malfunction Symptoms
Although the name suggests that the radiator cap is just a normal cap holding the coolant inside the radiator, that’s only half of its function. The radiator cap is actually a two-way valve, holding the coolant inside, like we said, but also maintaining system pressure.
How does a radiator cap work?
When you heat a liquid to a certain point, it starts to boil and eventually vaporize, changing its properties by going from a liquid to gas. In normal conditions, water boils at 212 degrees Fahrenheit, but by pressurizing it we can raise its boiling point substantially. Cooks do this all the time. They use a pressure cooker to cook food faster thanks to the hotter water inside. This is the same concept with the radiator cap and the radiator.
The pressure inside the radiator is kept at 16 pounds per square inch (in most cases), and it’s all regulated by the radiator cap. It’s a very delicate system. If the pressure isn’t maintained, the coolant can boil and evaporate, putting the engine at risk of overheating. On the other hand, if the pressure builds up too much you better hope that a hose lets go before the radiator ruptures. If that happens, you’ll be looking at a brand new radiator, and those aren’t cheap.
Radiator cap malfunction symptoms
As such, detecting a bad radiator cap early can be extremely good on your wallet and watch. A skilled mechanic can check whether your radiator cap is fit for the job in less than five minutes, but if you want to do it yourself or simply want to learn about inspections and the symptoms of radiator cap, continue reading this article.
The first symptom is coolant leak, whether it be from the radiator or the cap itself. A punctured radiator can be the result of a bad cap. The cap doesn’t just let go suddenly. In most cases, there are some tell-tale signs, the first one being coolant escaping from your cap.
Another obvious symptom is engine begin to overheating. If the coolant has escaped or isn’t allowed to move freely, you might notice your engine temps rapidly rising. If that’s the case, you want to immediately stop or you risk overheating the engine, which is never a good thing.
Read also: Symptoms of a bad idle control valve
Radiator cap inspections
Check the leaking in cap area
If you notice liquid around the edges of the cap, investigate further. With a bad cap, you can even hear antifreeze bubbling away sometimes. But be careful. Do not open the cap until the car and the coolant have a chance to cool off. Opening the cap when the car is hot can seriously scar you if the hot coolant sprays all over you (and it usually erupts like a geyser).
Check the plunger condition
The spring-loaded plunger in the cap can get jammed, trapping the coolant in a certain place, restricting access from the cooling system to the overflow reservoir. A quick visual inspection of the overflow reservoir will show if that’s the case
Test the radiator cap using pressure gauge
The cap can also be tested with a pressure gauge. If the pressure drops when testing it, try to clean the cap and test it again. If it gives the same results again, it needs to be replaced. Replacement caps are easy to come by. They’re very cheap and all you really have to do is buy one with the exact same pressure rating. Again, make sure that the car has cooled down before replacing the radiator cap if you want to avoid burns.
How does a radiator cap work?
When you heat a liquid to a certain point, it starts to boil and eventually vaporize, changing its properties by going from a liquid to gas. In normal conditions, water boils at 212 degrees Fahrenheit, but by pressurizing it we can raise its boiling point substantially. Cooks do this all the time. They use a pressure cooker to cook food faster thanks to the hotter water inside. This is the same concept with the radiator cap and the radiator.
The pressure inside the radiator is kept at 16 pounds per square inch (in most cases), and it’s all regulated by the radiator cap. It’s a very delicate system. If the pressure isn’t maintained, the coolant can boil and evaporate, putting the engine at risk of overheating. On the other hand, if the pressure builds up too much you better hope that a hose lets go before the radiator ruptures. If that happens, you’ll be looking at a brand new radiator, and those aren’t cheap.
Radiator cap malfunction symptoms
As such, detecting a bad radiator cap early can be extremely good on your wallet and watch. A skilled mechanic can check whether your radiator cap is fit for the job in less than five minutes, but if you want to do it yourself or simply want to learn about inspections and the symptoms of radiator cap, continue reading this article.
The first symptom is coolant leak, whether it be from the radiator or the cap itself. A punctured radiator can be the result of a bad cap. The cap doesn’t just let go suddenly. In most cases, there are some tell-tale signs, the first one being coolant escaping from your cap.
Another obvious symptom is engine begin to overheating. If the coolant has escaped or isn’t allowed to move freely, you might notice your engine temps rapidly rising. If that’s the case, you want to immediately stop or you risk overheating the engine, which is never a good thing.
Read also: Symptoms of a bad idle control valve
Radiator cap inspections
Check the leaking in cap area
If you notice liquid around the edges of the cap, investigate further. With a bad cap, you can even hear antifreeze bubbling away sometimes. But be careful. Do not open the cap until the car and the coolant have a chance to cool off. Opening the cap when the car is hot can seriously scar you if the hot coolant sprays all over you (and it usually erupts like a geyser).
Check the plunger condition
The spring-loaded plunger in the cap can get jammed, trapping the coolant in a certain place, restricting access from the cooling system to the overflow reservoir. A quick visual inspection of the overflow reservoir will show if that’s the case
Test the radiator cap using pressure gauge
The cap can also be tested with a pressure gauge. If the pressure drops when testing it, try to clean the cap and test it again. If it gives the same results again, it needs to be replaced. Replacement caps are easy to come by. They’re very cheap and all you really have to do is buy one with the exact same pressure rating. Again, make sure that the car has cooled down before replacing the radiator cap if you want to avoid burns.
Subscribe to:
Posts (Atom)